Lambda và S3
Lambda và S3
In this section, we will configure a Lambda function with API Gateway. We will reuse the template of the previous section (API Gateway and ECS) Trong phần này, thì chúng ta sẽ cấu hình hàm lambda với API Gateway. Cúng ta sẽ sử dụng lại mẫu ở trong phần trước (API Gateway and ECS)
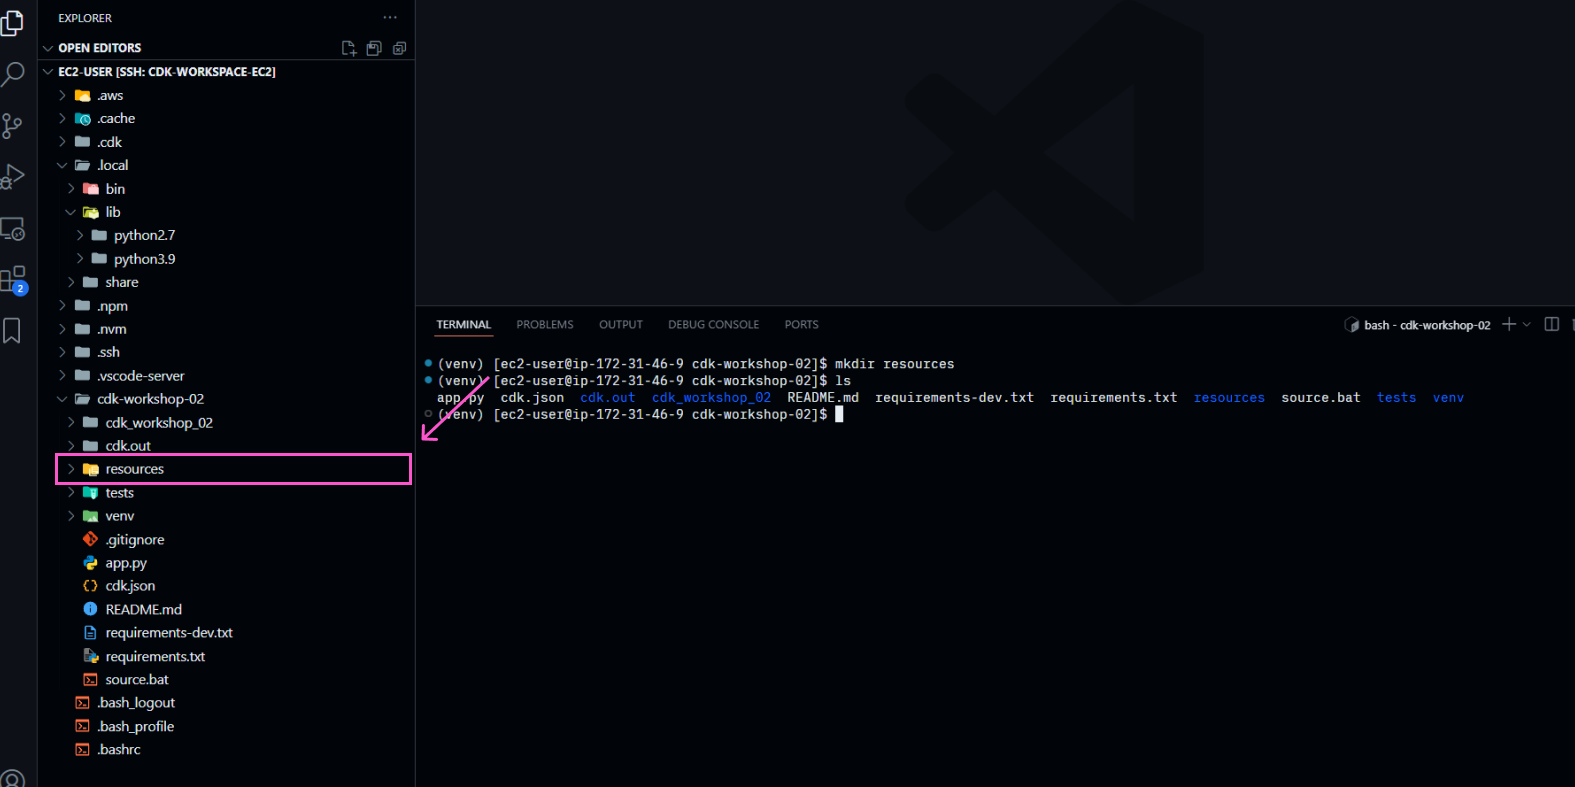
- Tạo một thư mục có tên là
resourcesở trong phần gốc của thư mục dự án
mkdir resources
- Tạo tệp tin
widget.jsở trong thư mụcresources(sử dụng để tạo lambda)
/*
Đoạn mã này được dùng để gọi tới hàm xử lý phản hồi của hàm bất đồng bộ.
Nó minh họa cho việc sử dụng async-await.
AWS hỗ trợ cả async-await và promises
Để biết thêm thông tin thì vui lòng xem thêm:
https://developer.mozilla.org/en-US/docs/Web/JavaScript/Reference/Statements/async_function
https://developer.mozilla.org/en-US/docs/Web/JavaScript/Guide/Using_promises
https://docs.aws.amazon.com/sdk-for-javascript/v2/developer-guide/calling-services-asynchronously.html
https://docs.aws.amazon.com/lambda/latest/dg/nodejs-prog-model-handler.html
*/
const { S3Client, ListObjectsV2Command } = require("@aws-sdk/client-s3");

exports.main = async function(event, context) {
  var method = event.httpMethod;
  const bucketName = process.env.BUCKET; // Chắc chắn là biến `BUCKET` có tồn tại
    if (!bucketName) {
      console.error('No bucket name provided in environment variables.');
      return {
        statusCode: 500,
        body: 'No bucket name provided in environment variables.'
      };
    }

    const s3 = new S3Client();

    const params = {
      Bucket: bucketName
    };

    try {
      // Send the ListObjectsV2Command to S3
      const data = await s3.send(new ListObjectsV2Command(params));

      // Trích xuất key của object nếu như có tồn tại
      const objectKeys = data.Contents ? data.Contents.map(obj => obj.Key) : [];

      // Return a response
      return {
        statusCode: 200,
        body: JSON.stringify({ "objectKeys": objectKeys })
      };
    } catch (err) {
      // Log the detailed error for troubleshooting
      console.error('Error listing objects:', JSON.stringify(err, null, 2));
      return {
        statusCode: 500,
        body: `Error listing objects: ${err.message}`
      };
    }
}
Hàm lambda này sẽ trả về key của các object có trong S3 bucket.
- Trong
cdk_workshop_02/cdk_workshop_02_stack.py, khởi tạo một S3 Bucket
# Add S3 bucket
bucket = s3.Bucket(self, "WidgetStore")
- Tạo một Lambda function và cho hàm này có quyền đọc và ghi
# Add Lambda function
handler = lambda_.Function(self, "WidgetHandler",
  runtime=lambda_.Runtime.NODEJS_18_X,
  code=lambda_.Code.from_asset("resources"),
  handler="widget.main",
  environment=dict(BUCKET=bucket.bucket_name)
)

# Grant bucket permission to lambda function
bucket.grant_read_write(handler)
- Tạo một API Gateway intergration (tích hợp)
# Create intergration
get_widgets_integration = apigateway.LambdaIntegration(
	handler,
	request_templates={"application/json": '{ "statusCode": "200" }'}
)
- Tạo một tài nguyên mới, và thêm phương thức mới cho API Gateway
# Add resource and method for proxy request
lambda_proxy = api.root.add_resource("lambda")
lambda_proxy.add_method("GET", get_widgets_integration)
- Đừng quên là chúng ta cũng phải thêm các thư viện phù hợp để xài Lambda, API Gateway và S3.
Sau khi thêm kiểm tra lại mã trong tệp cdk_workshop_02/cdk_workshop_02_stack.py.
from aws_cdk import (
    Stack,
    aws_ecs as ecs,
    aws_ecs_patterns as ecsp,
    aws_apigateway as apigateway,
    aws_s3 as s3,
    aws_lambda as lambda_
)
from constructs import Construct

class CdkWorkshop02Stack(Stack):

    def __init__(self, scope: Construct, construct_id: str, **kwargs) -> None:
        super().__init__(scope, construct_id, **kwargs)

        # Declare a Load Balancer Fargate
        lb_fargate_service = ecsp.ApplicationLoadBalancedFargateService(
          self,
          "Workshop02-MyWebServer",
          task_image_options=ecsp.ApplicationLoadBalancedTaskImageOptions(
              image=ecs.ContainerImage.from_registry("nginxdemos/hello")),
          public_load_balancer=True,
          desired_count=3
        )

        # Define API Gateway
        api = apigateway.RestApi(self, "ProxyToLBECS")

        # Get the DNS value of the Application Load Balancer
        lb = lb_fargate_service.load_balancer
        lb_dns = lb_fargate_service.load_balancer.load_balancer_dns_name

        # Add resource and method for proxy request
        proxy = api.root.add_resource("ecs")
        proxy.add_method("GET", apigateway.HttpIntegration(f"http://{lb_dns}"))

        # Add S3 bucket
        bucket = s3.Bucket(self, "WidgetStore")

        # Add Lambda function
        handler = lambda_.Function(self, "WidgetHandler",
        		runtime=lambda_.Runtime.NODEJS_18_X,
            code=lambda_.Code.from_asset("resources"),
            handler="widget.main",
            environment=dict(BUCKET=bucket.bucket_name)
        )

        # Grant bucket permission to lambda function
        bucket.grant_read_write(handler)

        # Create intergration
        get_widgets_integration = apigateway.LambdaIntegration(
        	handler,
        	request_templates={"application/json": '{ "statusCode": "200" }'}
        )

        # Add resource and method for proxy request
        lambda_proxy = api.root.add_resource("lambda")
        lambda_proxy.add_method("GET", get_widgets_integration)
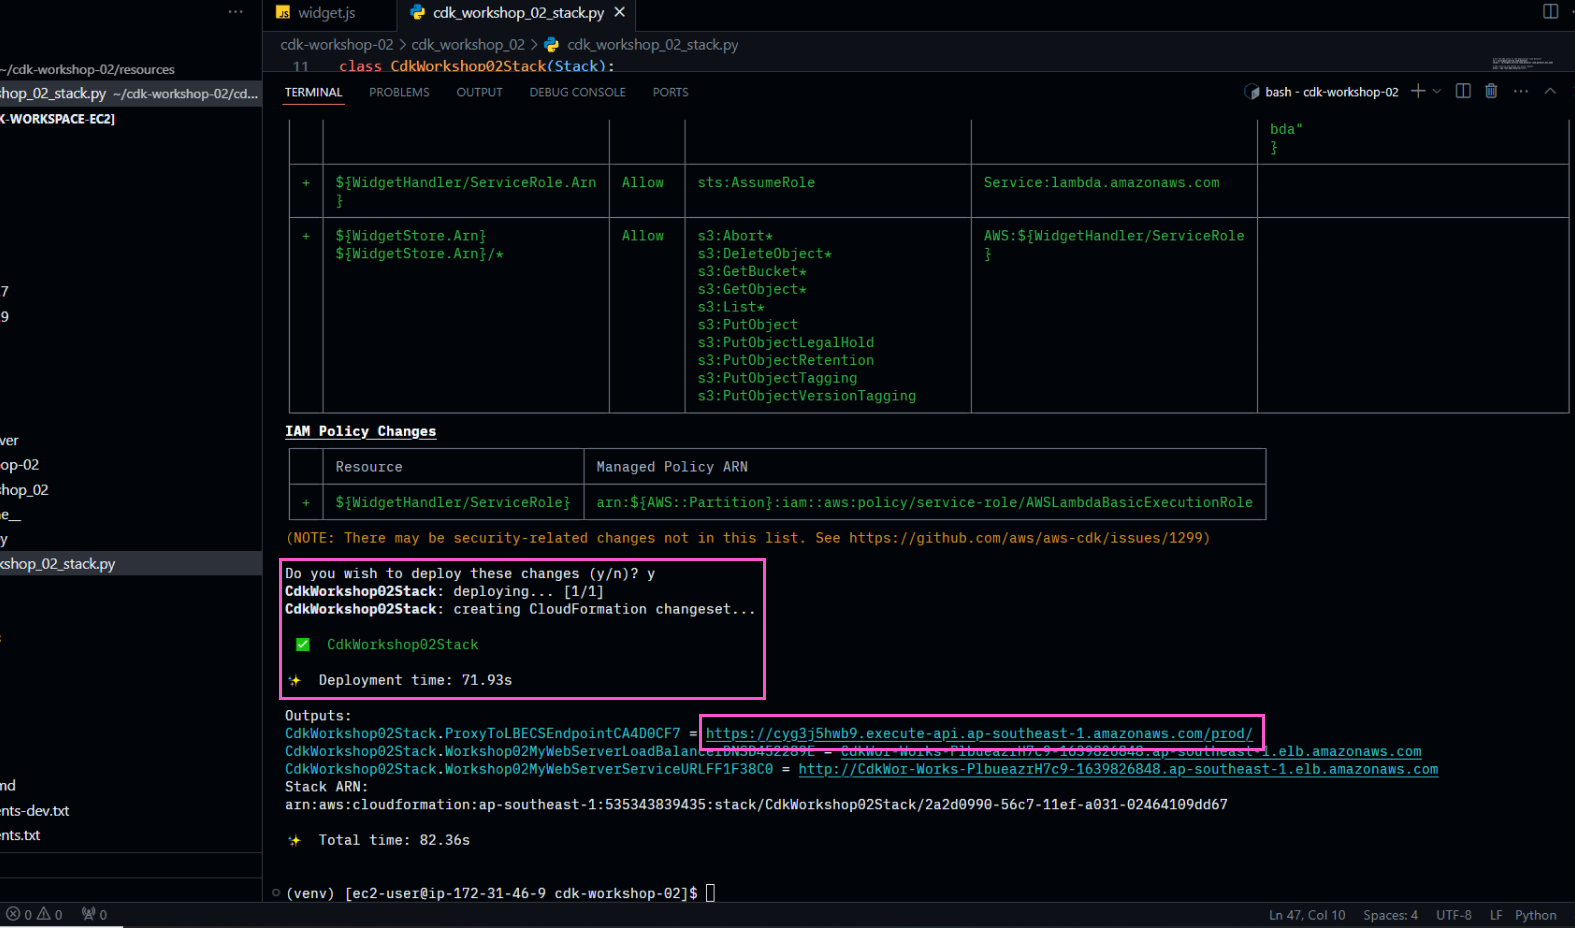
- Triển khai stack
cdk deploy
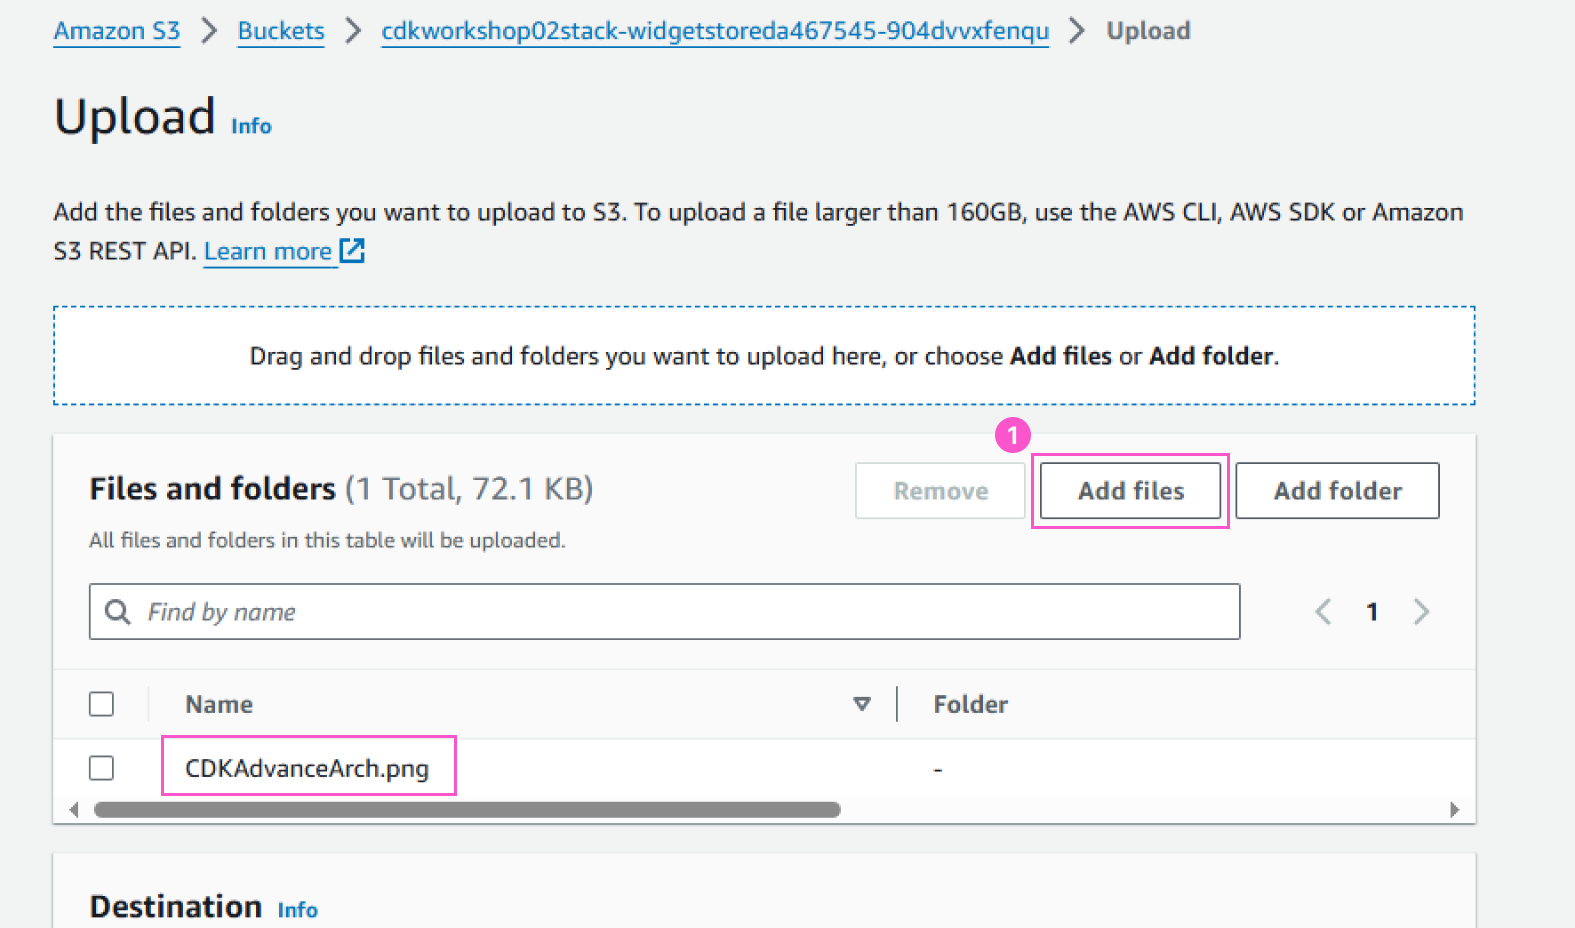
- Tải tệp tin lên S3 Bucket để kiểm tra
Truy cập vào đường link của API gateway, thêm path /lambda. Bạn sẽ thấy kết quả trả về từ hàm lambda.
Để kiểm tra, hãy truy cập vào S3 Console. Truy cập vào bucket được tạo và upload một file bất kỳ

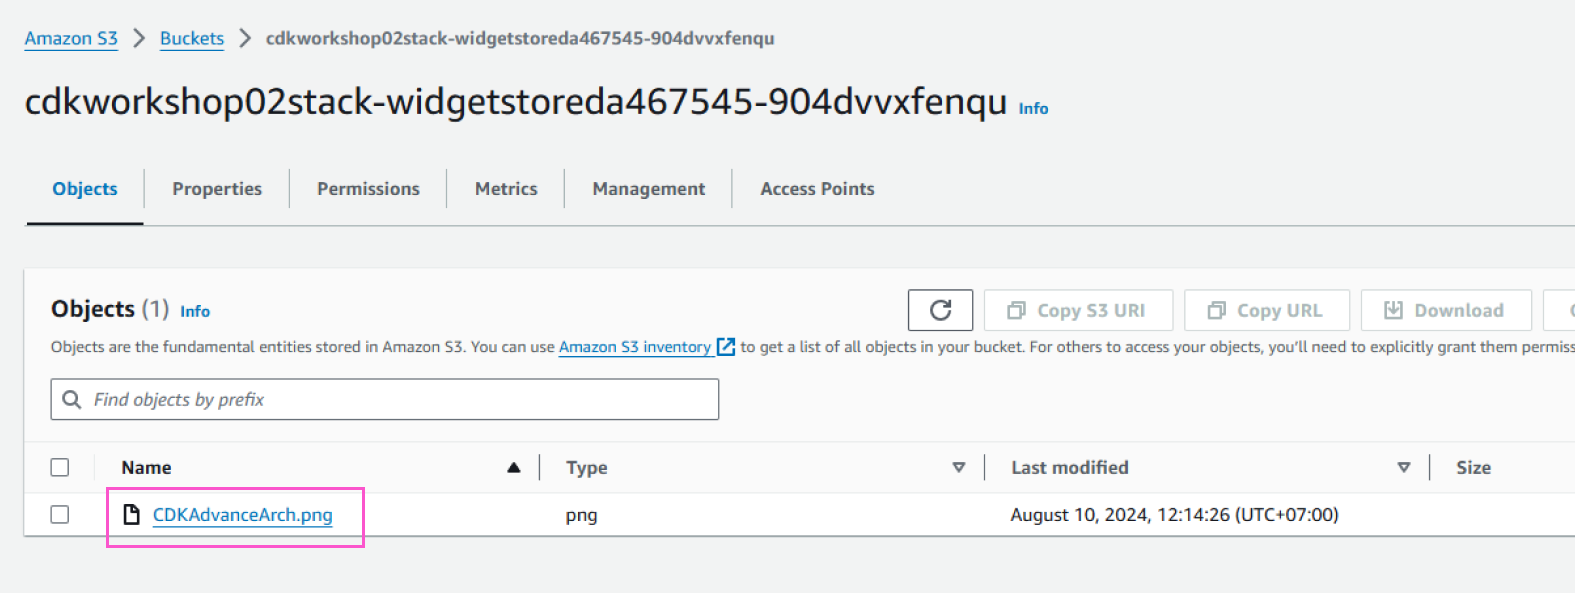
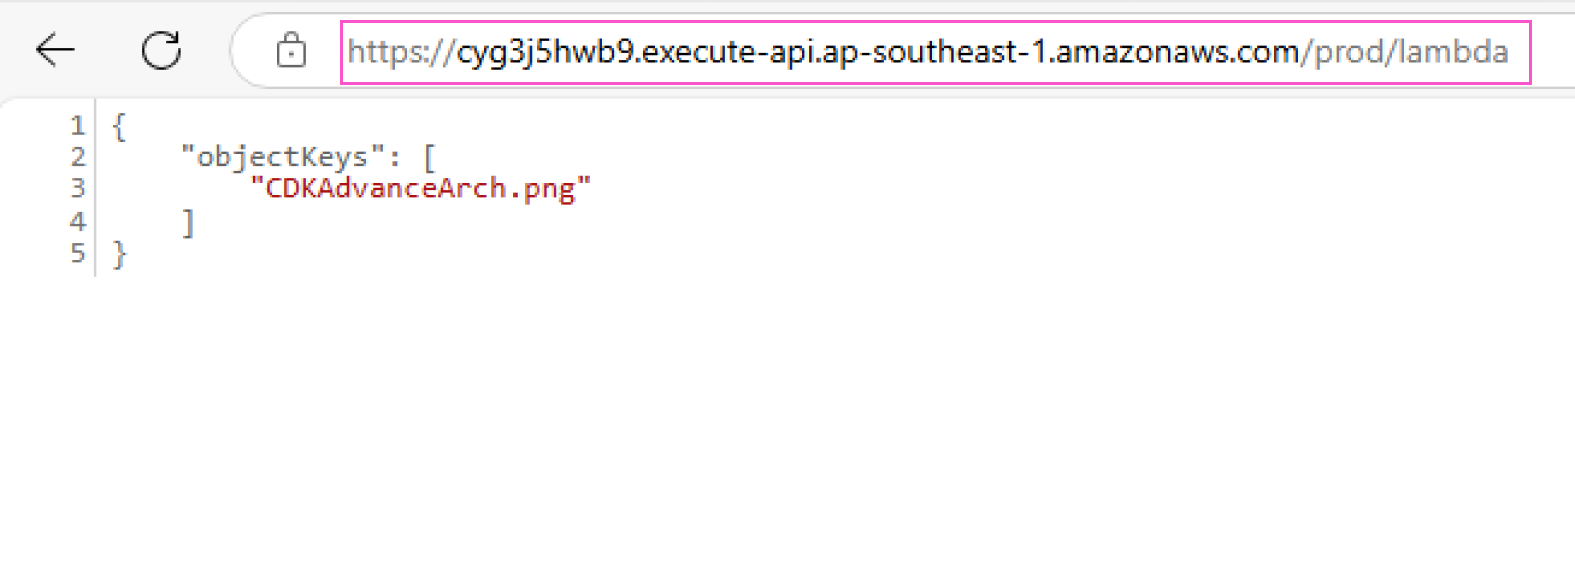
- Kiểm tra kết quả
Truy cập lại vào đường dẫn đến hàm lambda xxxxxxx.execute-api.[REGION].amazonaws.com/prod/lambda của API Gateway. Bạn sẽ thấy tên file mới được hiển thị.
Nếu bạn đã chạy được đến phần này, chúc mừng bạn đã hoàn thành phần thứ hai của bài lab CDK cơ bản 2. Ở phần tiếp theo, chúng ta sẽ tái cấu trúc lại project bằng cách tách nhỏ các thành phần trong tệp cdk_workshop_02/cdk_workshop_02_stack.py thành các file khác nhau, và sử dụng nested stack để triển khai kiến trúc hệ thống của chúng ta.